
Build Your Own Awesome Desk
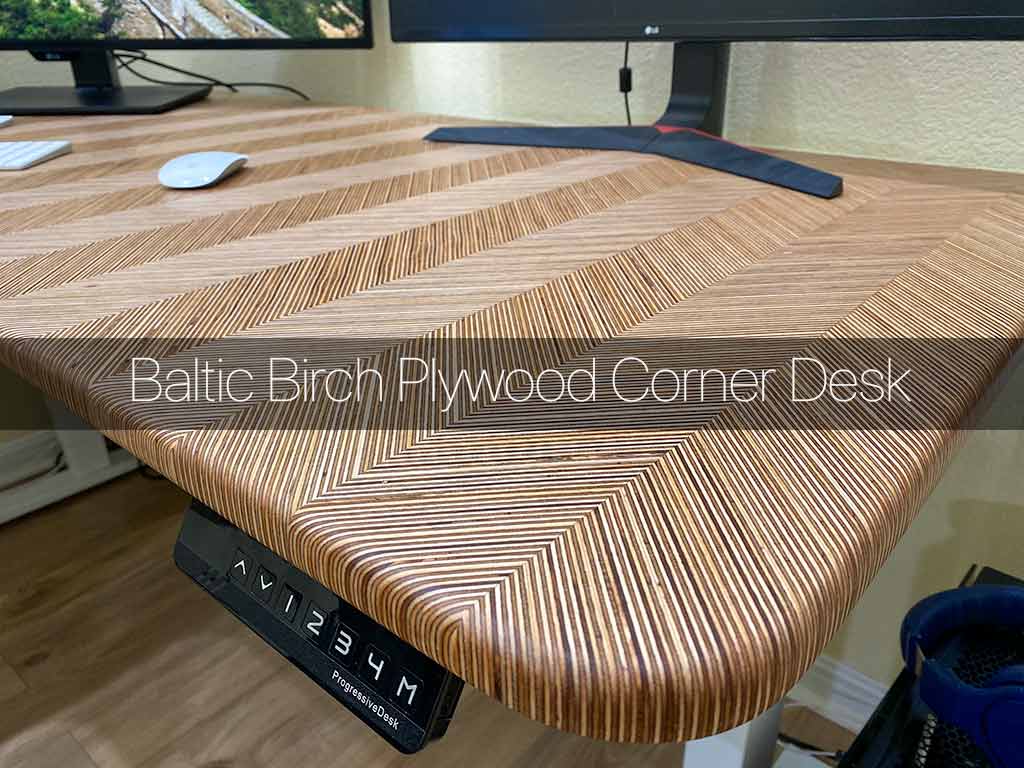
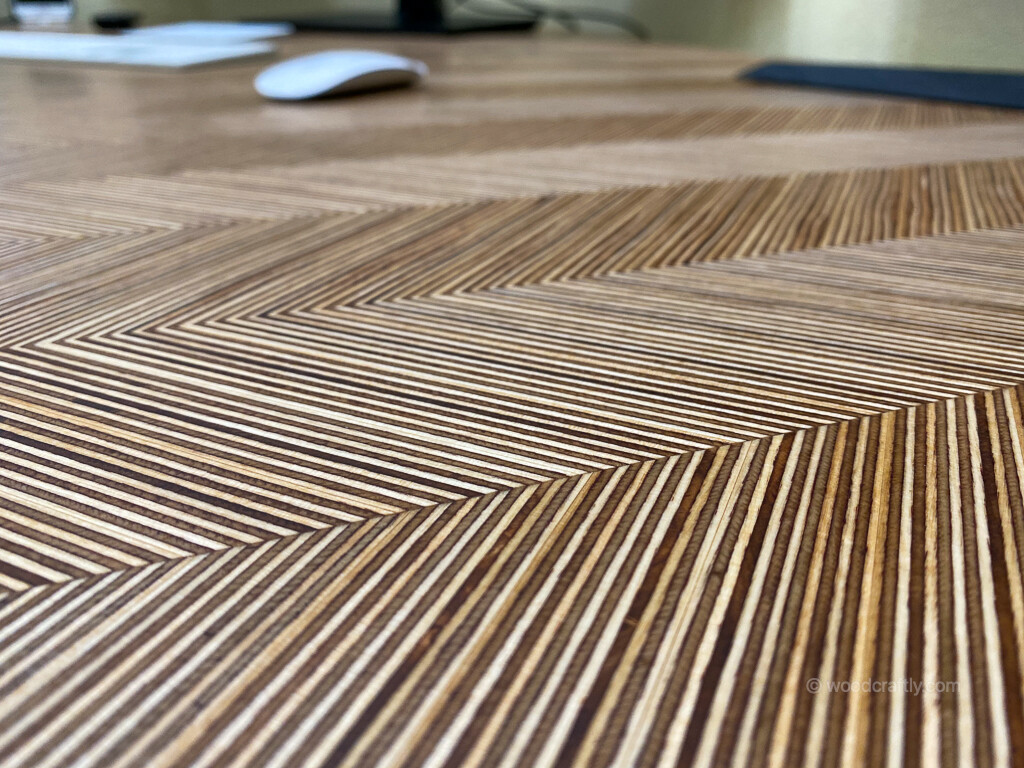
A beautiful table top made of 3/4-in baltic birch plywood and mounted on an adjustable motorized corner desk frame. The end grain and top finish makes this table an amazing piece of art.
If you are looking for a very unique corner desk without breaking the bank, this is an option. Use an adjustable frame or just some hairpin legs and you will wow everyone visiting you!

The same table frame (picture below) with table top included cost upwards of $1900. The frame alone is available for $550 from different sellers on Amazon. Click on the desk frame picture below to see all options on Amazon. They also have standard frames if you don’t have the space for a corner desk.

![]()
Part 1 – Creating A Sample Piece
Before getting to work, I researched the possibilities of using plywood to make incredible patterns. I settled on the idea to make some kind of herring bone pattern. The issue was that all projects I found where small and joint techniques used were just not feasible for the size of table top I planned.
The first thing I did, was building a sample I could use to test out different finishes and also to see the pattern in small scale.
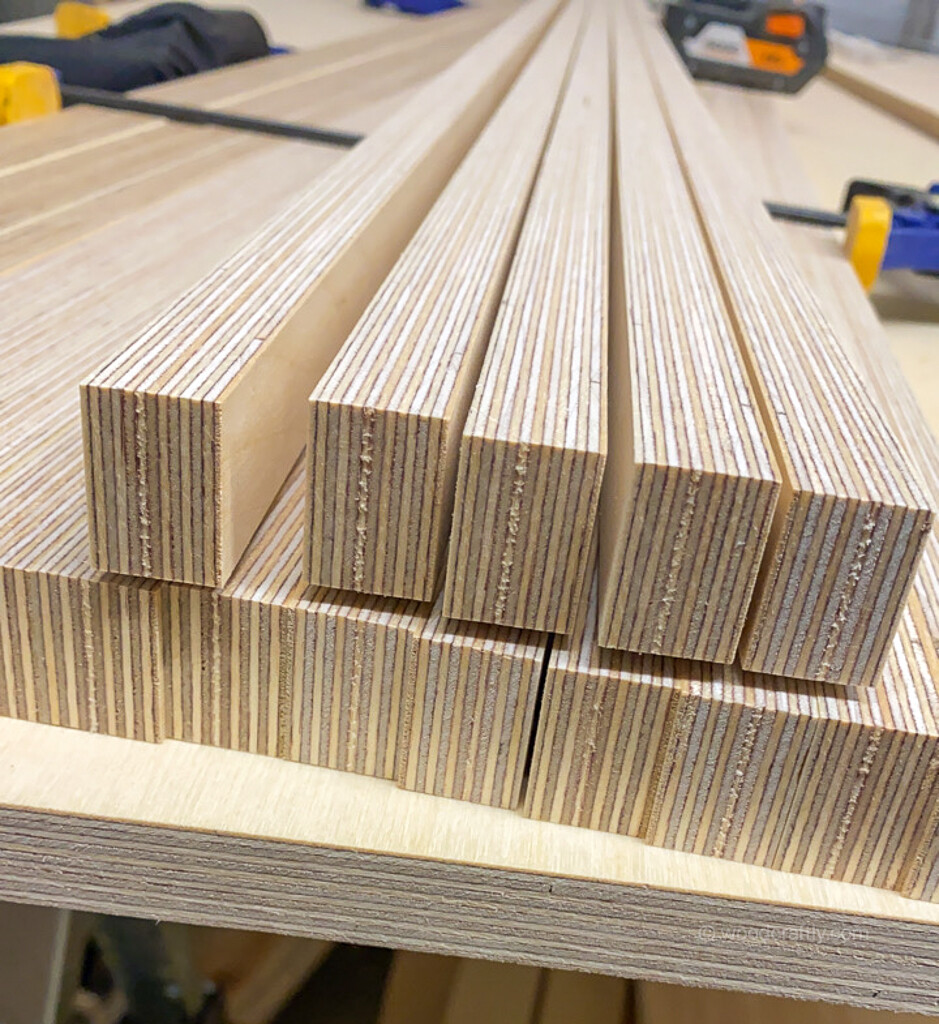
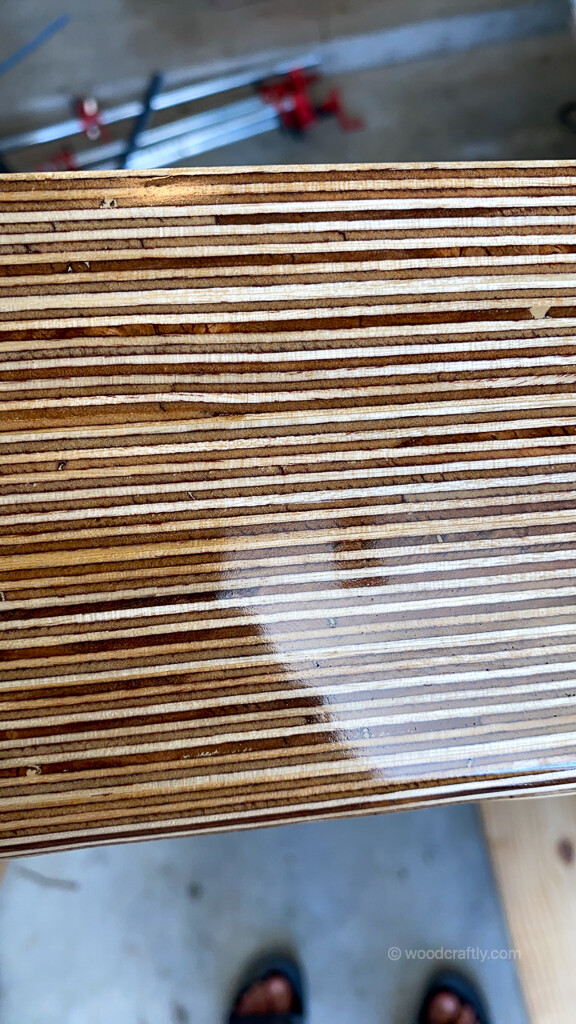
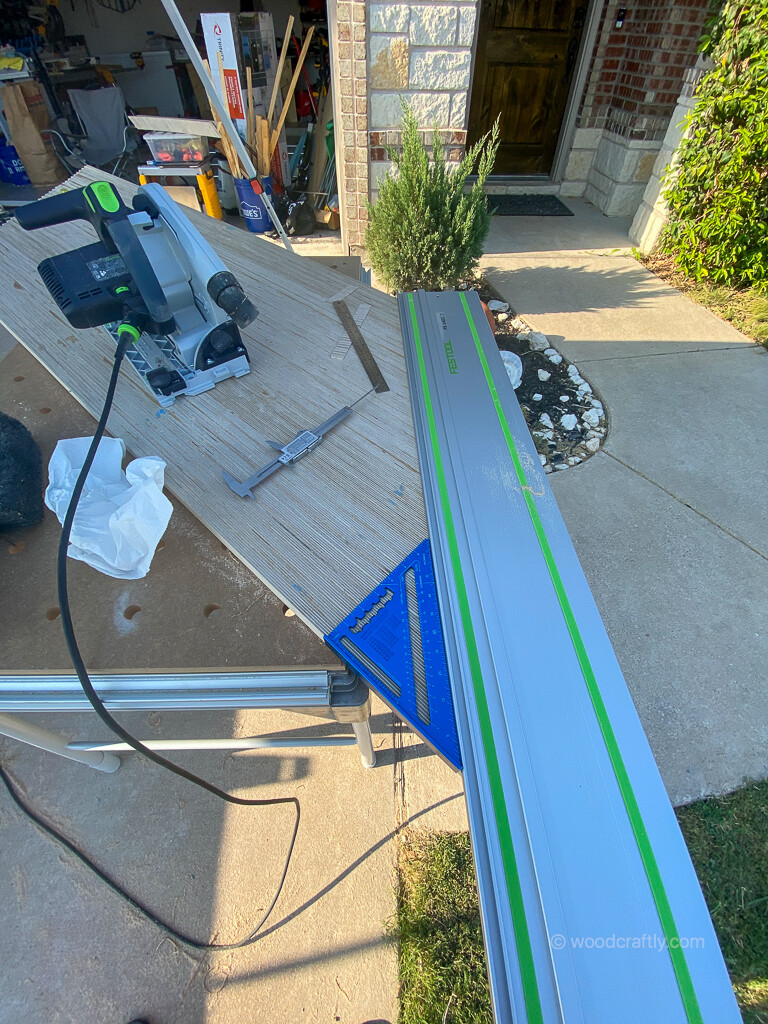
So I got to work. I did a short trip to my local lumber yard and got 2 8’x4′ baltic birch plywood sheets. I used my Festool Track Saw to cut 1-in strips from the plywood sheets.
Why 1-in strips? The width of the strips determines the table top thickness (since we want to see the end grain, the strips will be flipped around to end grain up).
I know it would probably easier to use a table saw but I only have a regular job site table saw with no large fence or out feed. Space limitations in my garage also prevent building something stable for my table saw.
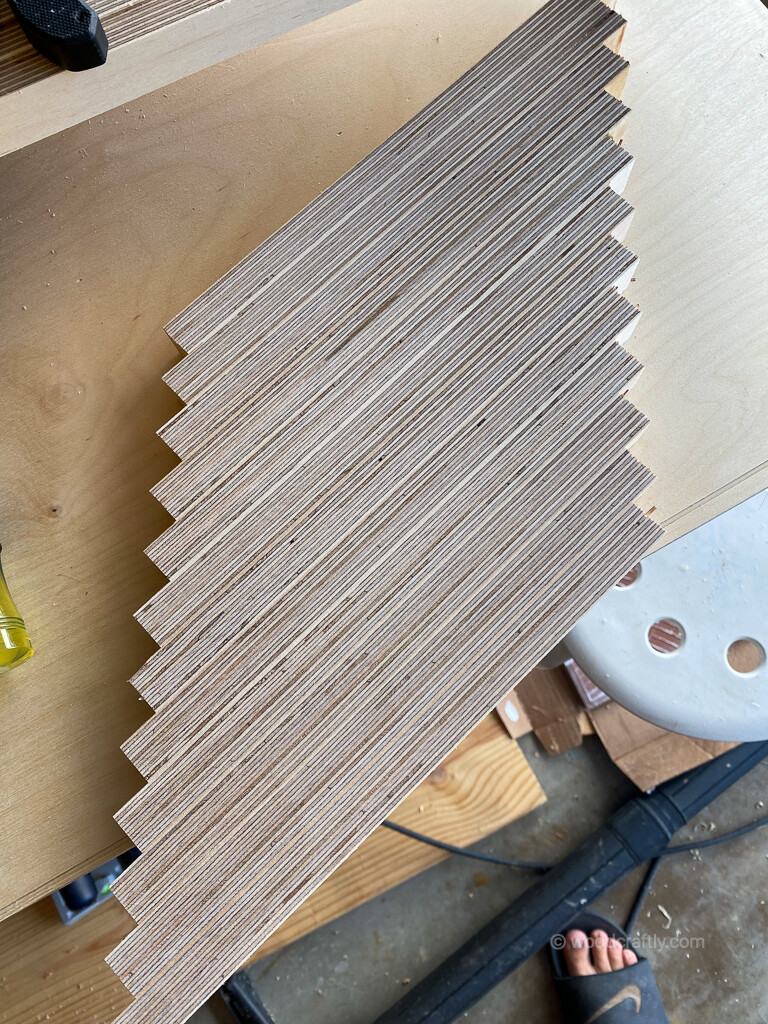
After the pieces are glued together (end grain up) I cut again strips in a 45 degree angle.
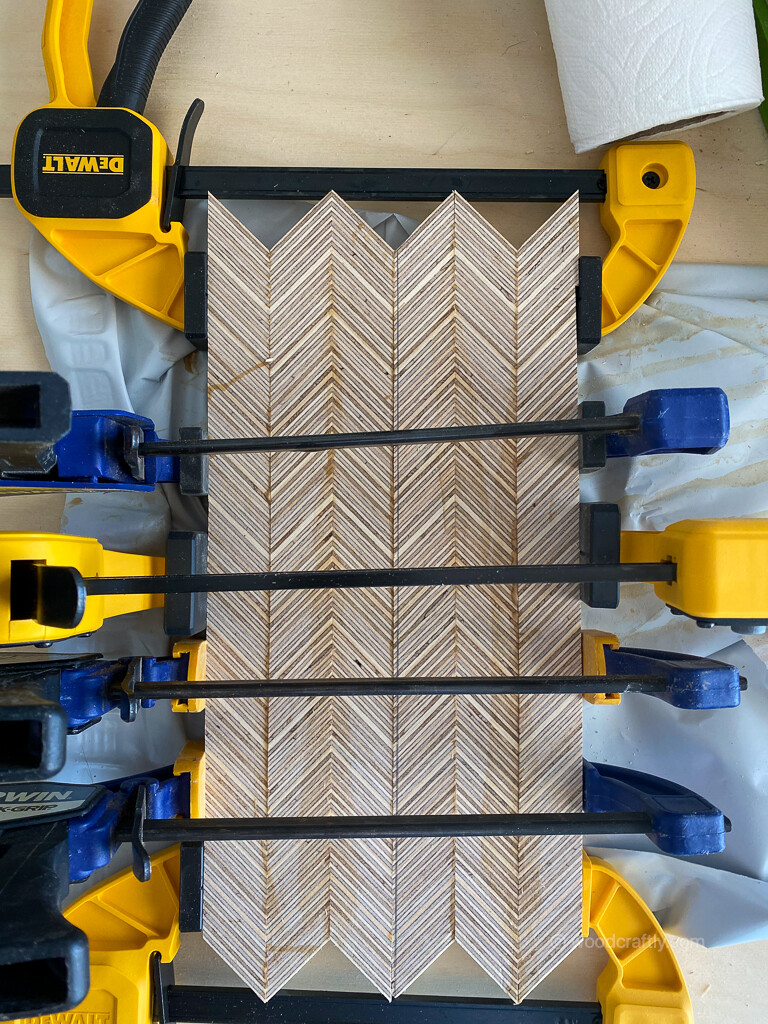
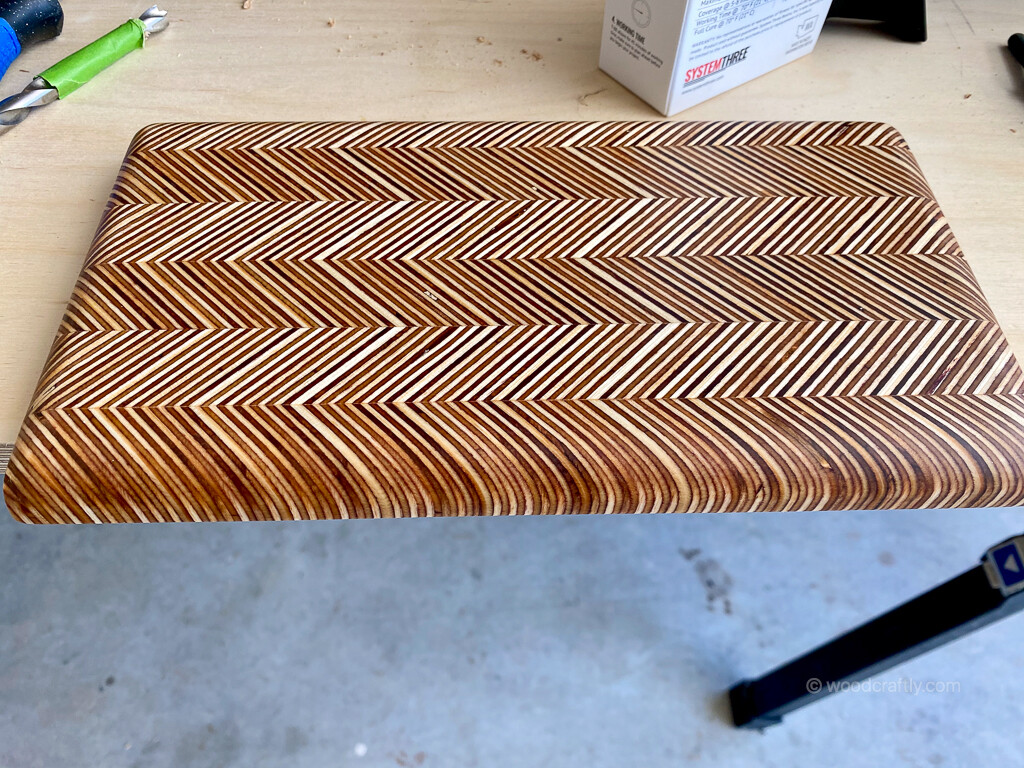
Those strips then were glued together in alternating direction to get the desired herring bone pattern.
After cutting straight edges the sample was ready for testing with different finishes and a threaded insert test.

I used a 1-1/2in round over bit to round the edges. Important here is to go light passes and quick to prevent burning marks.
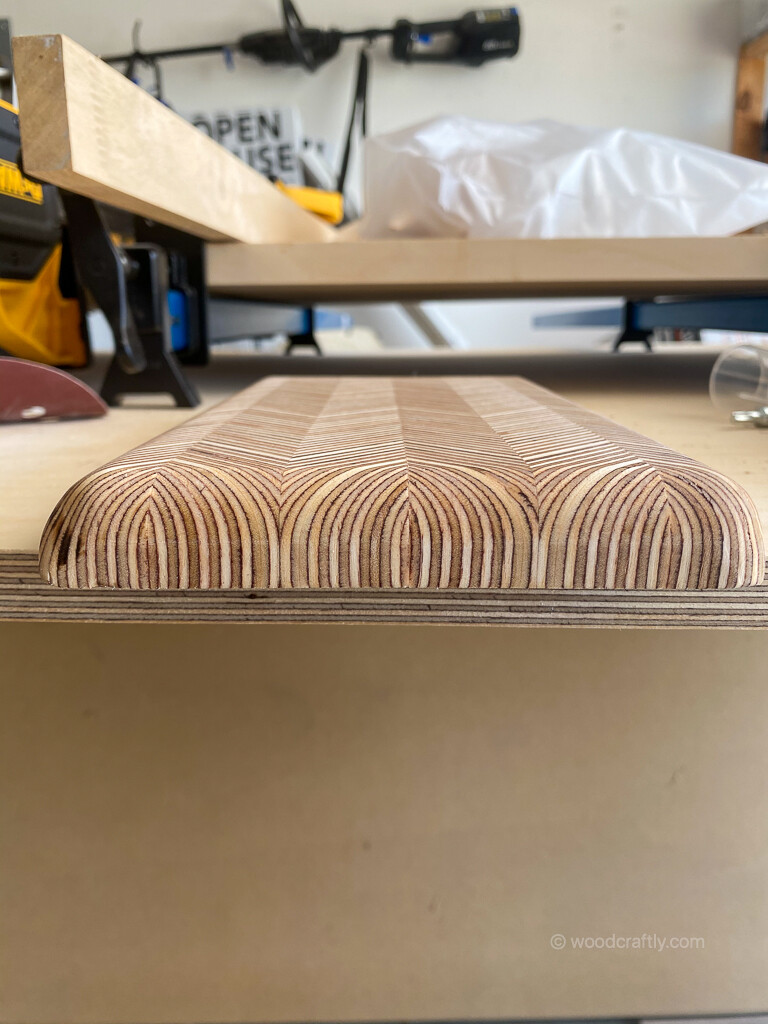
I experimented with polyurethane and epoxy. As you can see below, the poly was not looking very pleasant and had no character. It made the impression of a fast food restaurant table!
So I continued playing around with epoxy. I ended up with just keeping it at the seal layer. Sanding it down to 320 and using a home made mineral oil / bees wax paste as final touch. The results were amazing, it had a very smooth natural feeling touch and the matte shine made it look special.
The decision was made to just apply a thin epoxy seal layer and mineral oil / bees wax past to the final table top!
Part 2 – Building in Large Scale
Now the sweaty part of the project began, reproducing what I did with the sample but in large scale. I decided to go with 3in wide end grain strips. The 1in end grain strips would add way more workload and they are also quite hypnotizing when looking at it. Depending on the angle of the light the pattern changes, and having many small bi-directional lines can make your head spin!
I got back to work using the track saw to cut 1in strips from the plywood sheets and glueing them together.
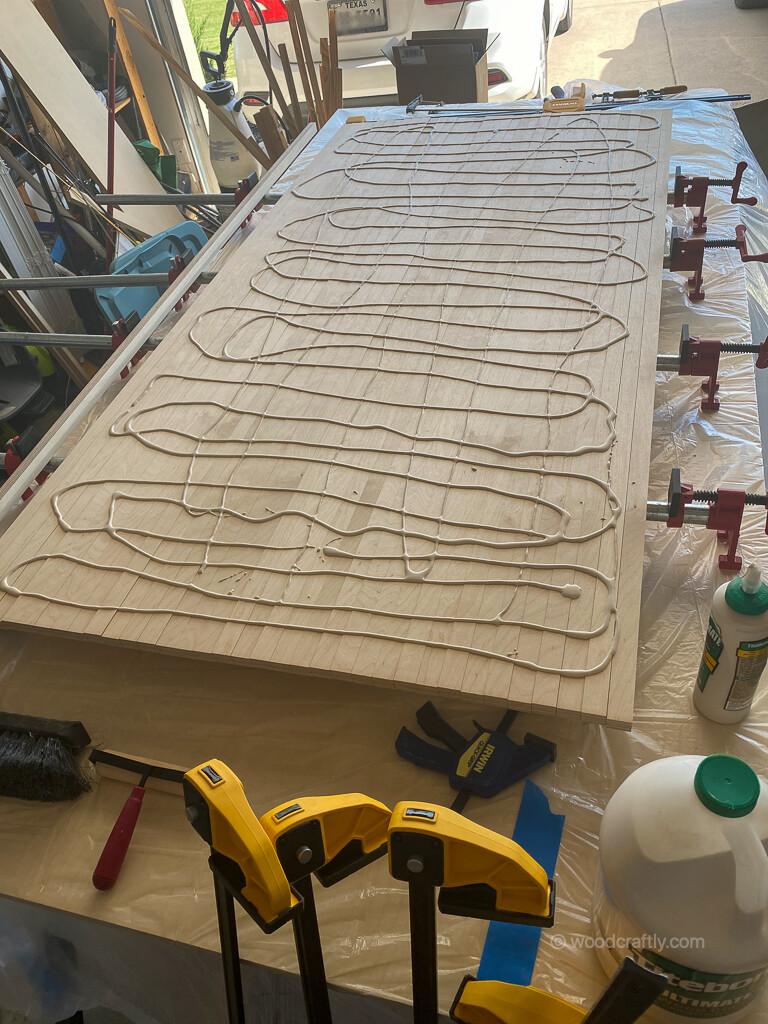
Lesson learned! I applied Titebond III to the complete area, that put me under a lot of pressure to spread the glue evenly before it starts to cure. Next time I will for sure only work on 5-6 strips at a time and move to the next 5-6 pieces. I would definitely recommend a helper for that section.
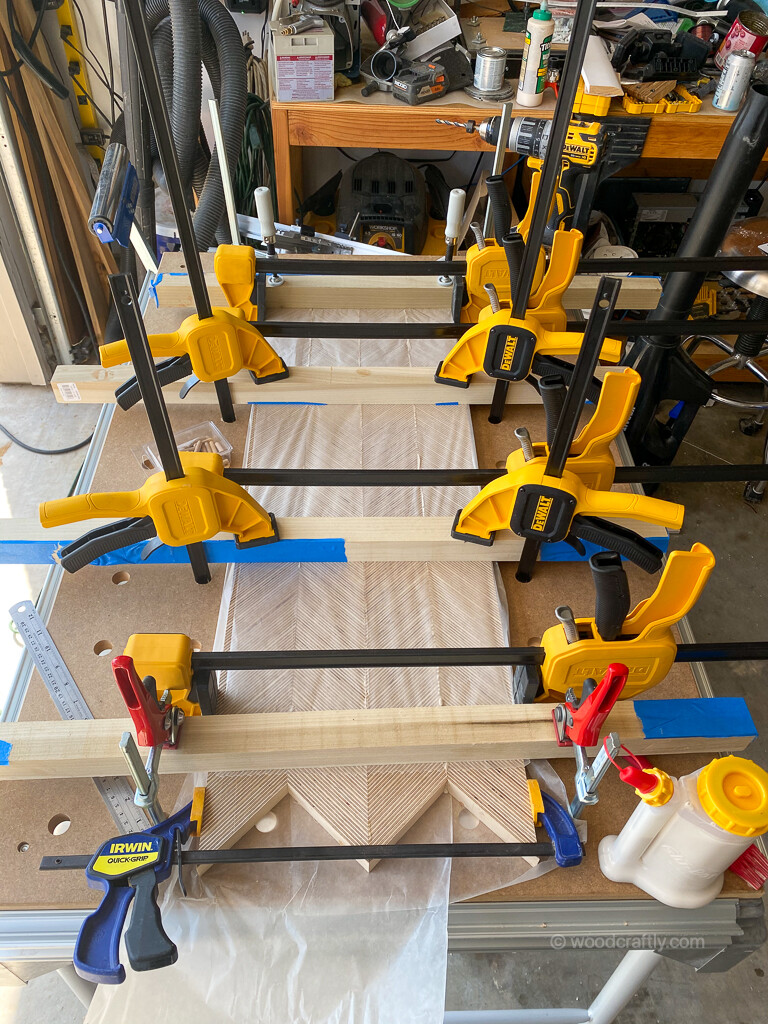
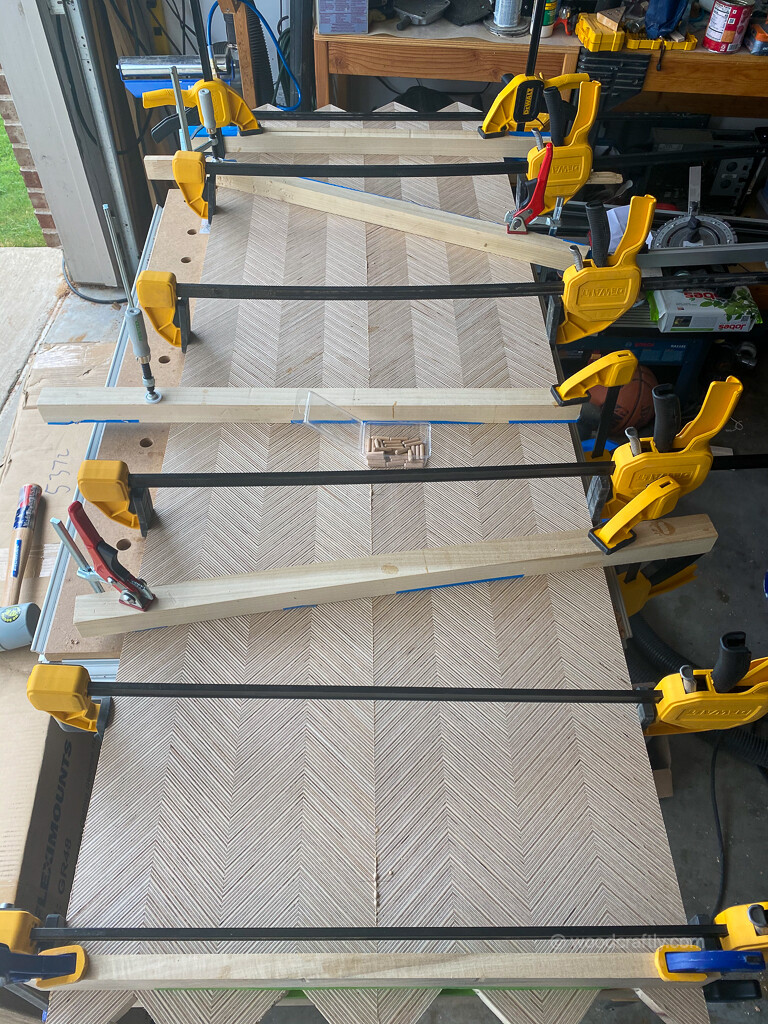
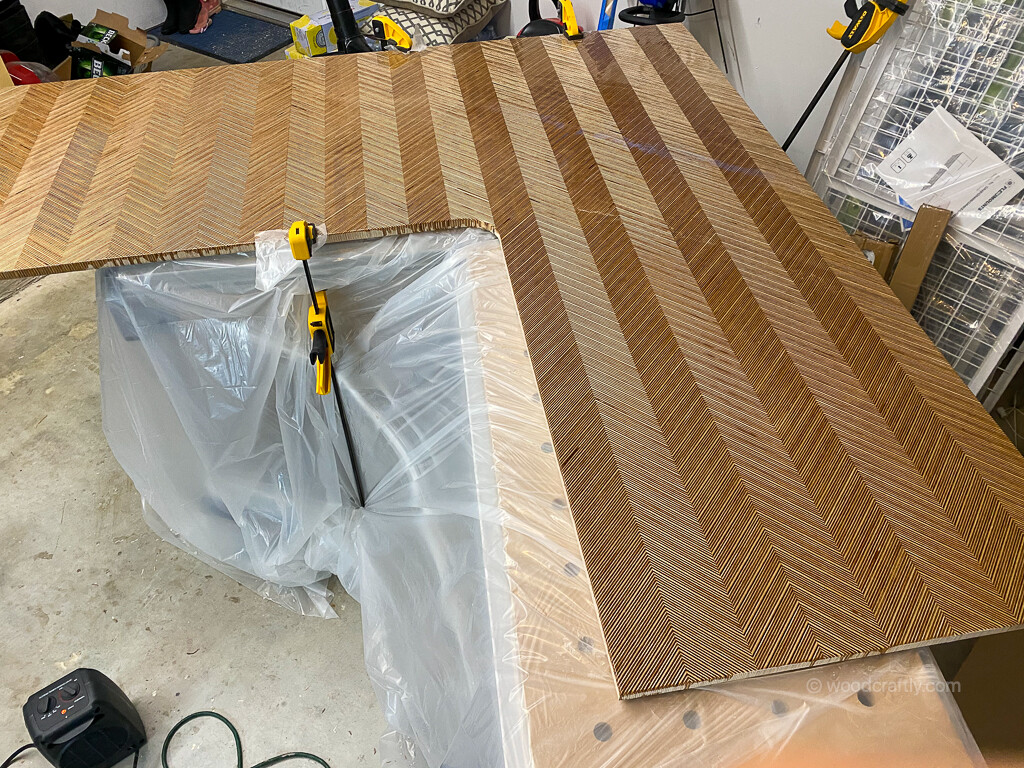
For the glue-up I tried as best as possible to align the pieces in a 45 degree angle to reduce waste when cutting them later in 45degree.
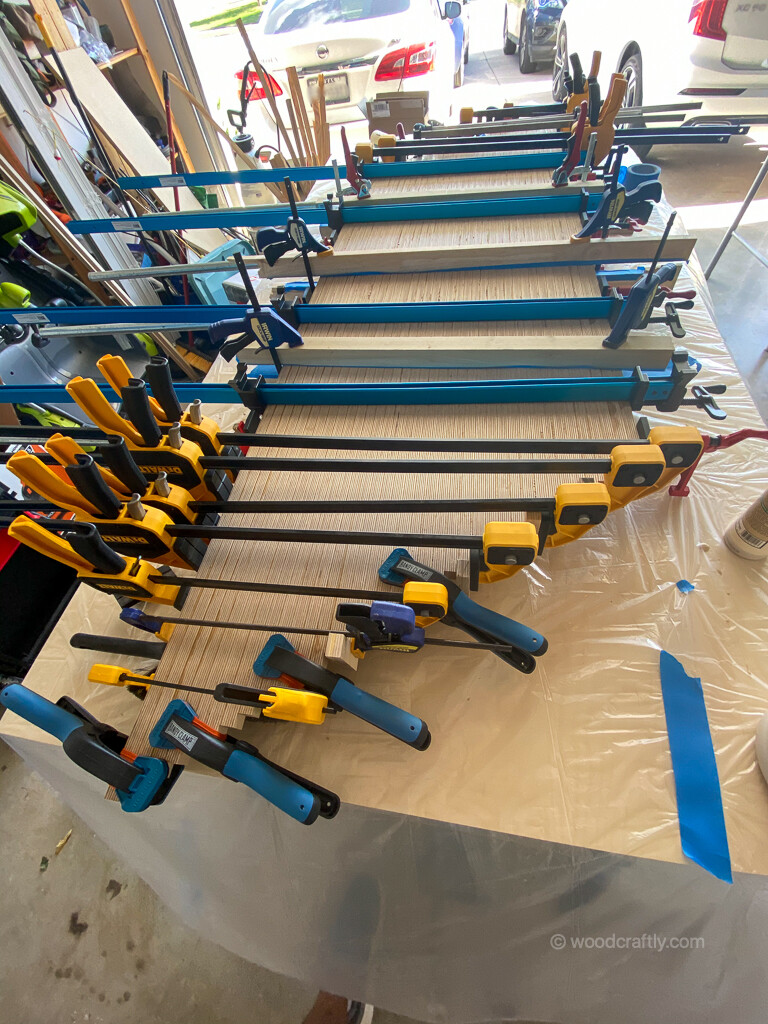
As you can see the phrase “you can never have enough clamps” is true. I actually had to order some. After reading some reviews I went with 6 Dewalt 36in Bar Clamps, 4 Rockler Sure-Foot 48in Clamps, 8 large Rockler Bandy Clamps (for the thinner end)s and 4 Bessey pipe clamps in addition to the Irwin and no-name clamps I already had, just for that project. I used some scrap pieces tote able to tighten 2 strips at the same time (as shown in the picture above).
Waiting 24hrs for the glue joints to cure I could move to the next step of cutting 3 inch wide strips in a 45 degree angle.
At that point I did experience an issue with my Festool track saw. The saw suddenly made horrible cuts.
After contacting Festool support, they advised me to return it to the dealer and get a replacement. That whole exchange went smooth and the replacement was cutting without issues.
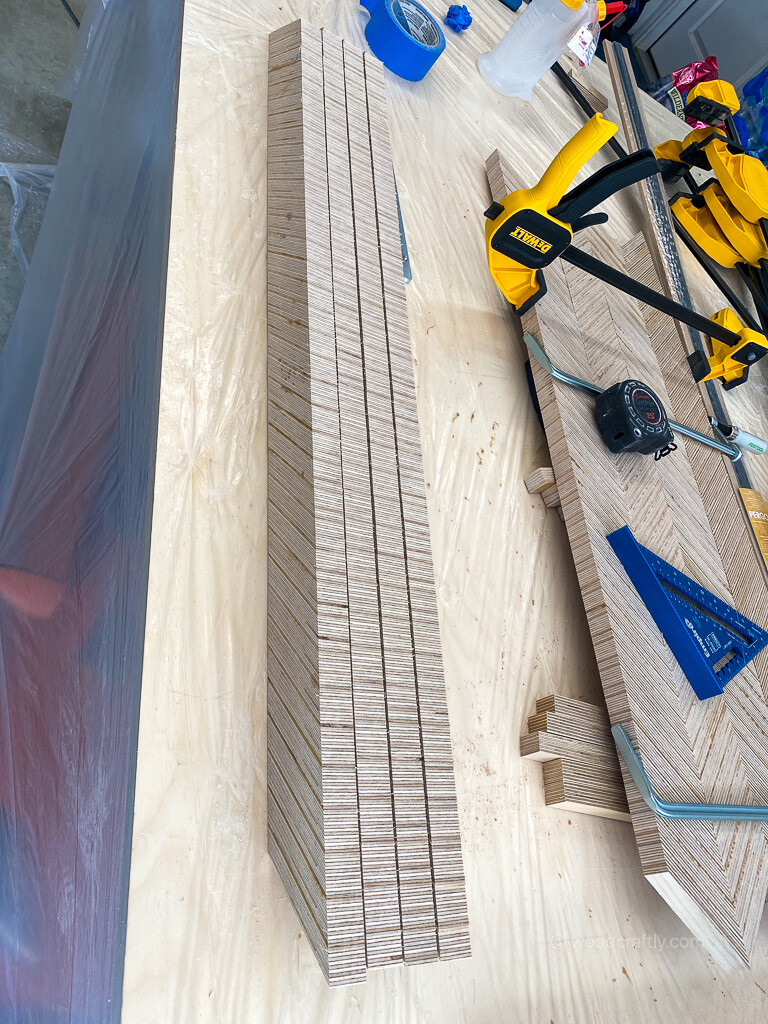
Now I had 31 of 3 in strips in 45 degree angle which I glued together to sections with 4 strips each (12in wide). I did use the PowerTec dowel jig to install dowels for a bit of extra strength in the joints. Then I clamped them down to the table to get them as aligned as possible. To prevent accidentally glueing the support to the workpiece, I used wax paper which is easily removed after the glue cured.
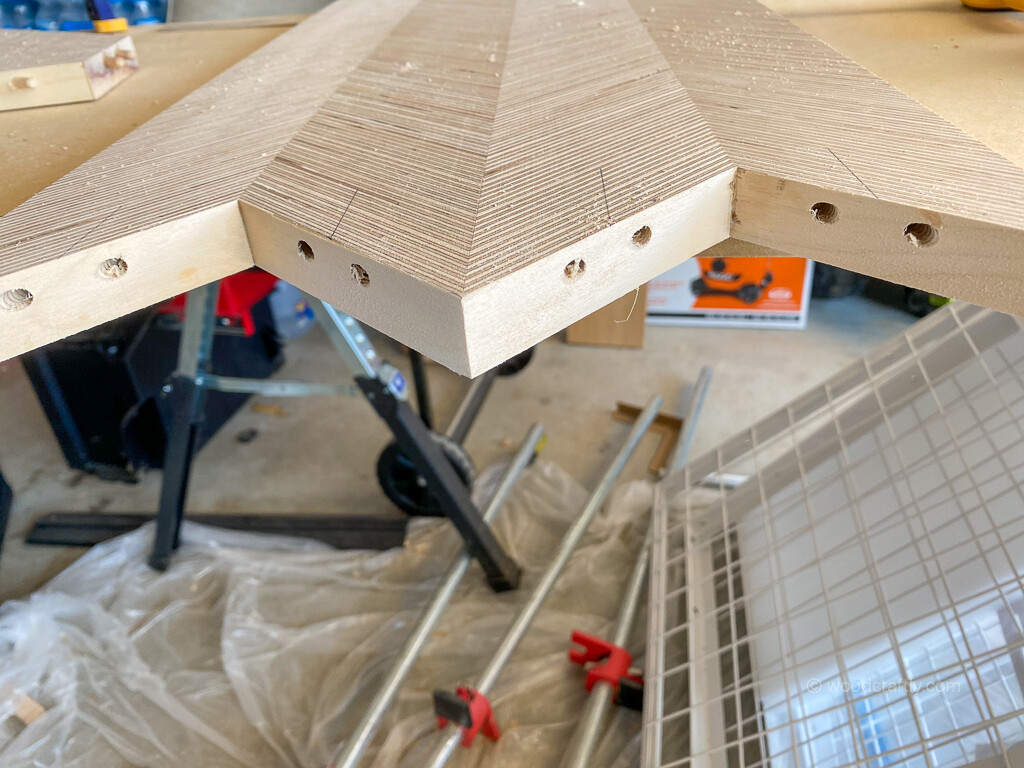
I repeated the step until I had 7 ( + 1 backup) sections and half a section to reach my desired table top length. Will all sections ready, I went on to focus on one side of the corner desk. Here I joint 2 section vertical. I was tricky because the sections where not good aligned and I had to play around which section fit best into each other. I used 8 dowels per section to add a bit of extra strength and keep them aligned during the glue up.
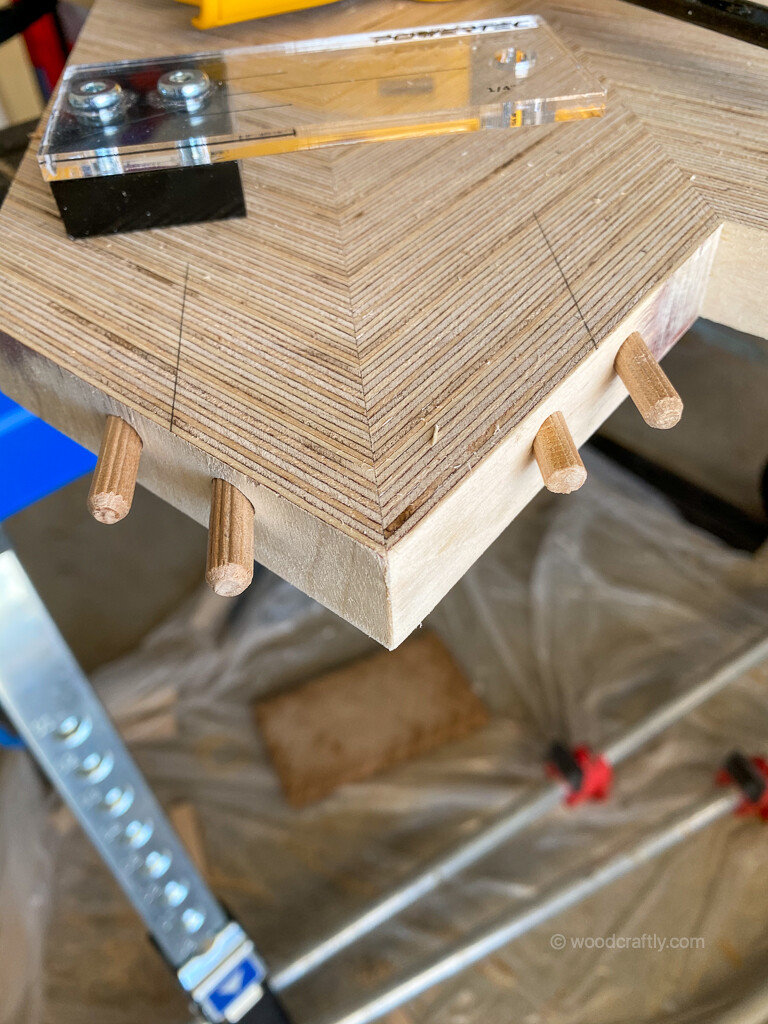
The PowerTec dowel jig definitely came in handy for that project. Every time I joined pieces I used dowels to help keep them align. The jig works well if you take your time and make sure you perfectly aligned the guide line on the jig with the line you made on your workpiece.
As you can see below, not everything worked out well! Since the project stretched over several weeks, the pieces started to warp and deform. After testing the joint for the last 2 vertical joined section, I found they are not perfectly fitting and there was a huge gap. Bummer! Well I started to carefully sand down the other edges until the gap was so small that I could fix it with some wood filler.

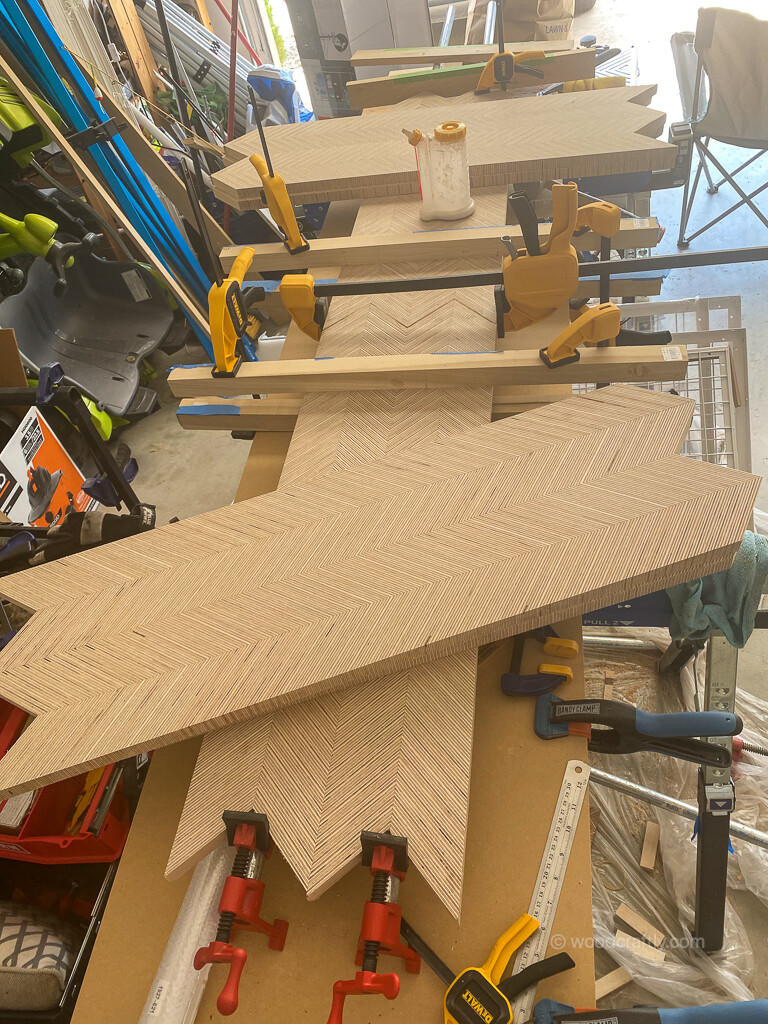
After the hiccups mentioned before, I went to work and joined the finished 2-piece-sections together (parallel).
After the glue cured, I started adding small sections to form a L shape. Same methods were used, dowels between the sections and Titebond III.
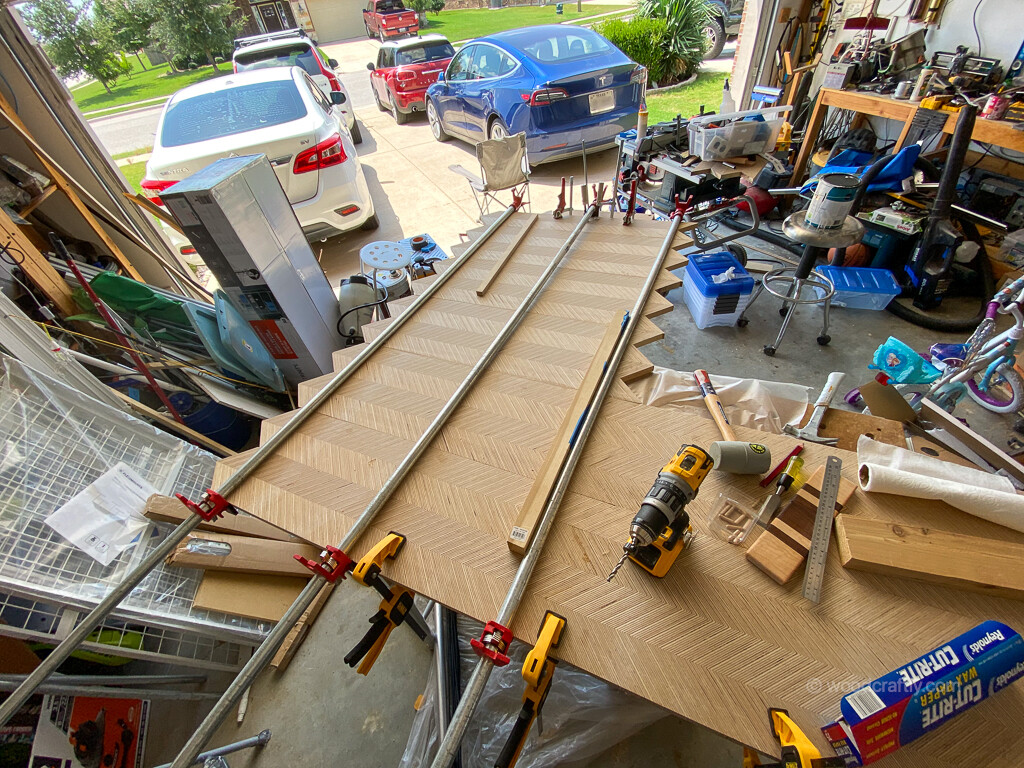
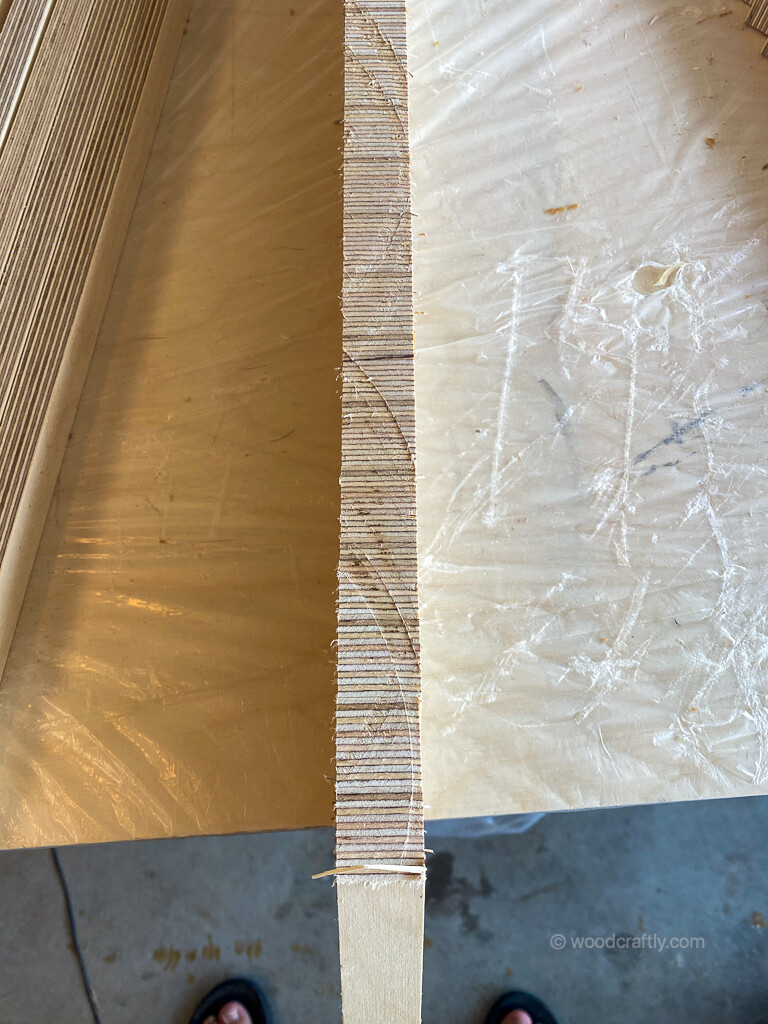
With the final piece glued up, I used again the Festool Track Saw to cut the top to final dimensions and remove the serrated edge. Now the table top slowly took its shape.
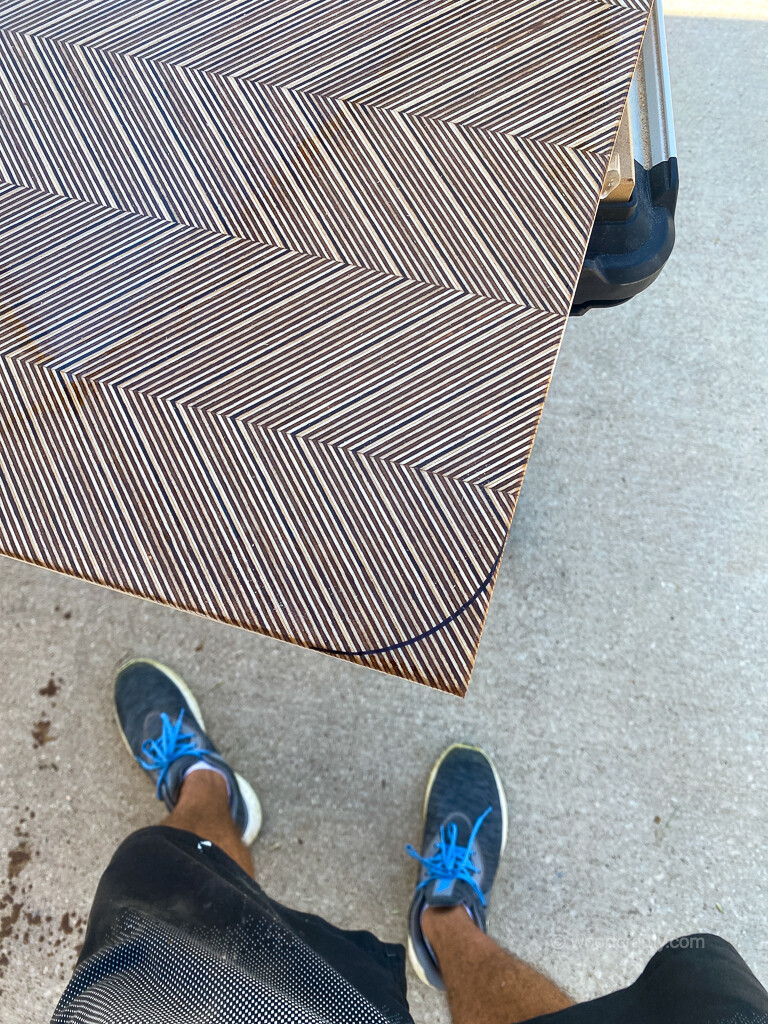
When cutting the last edge I leave the triangle on the corner. I used a duct tape role to draw a half circle for a round cut.

Using my Ridgid jig saw and extra thin blades, which made the round cut way easier.
With the cuts done I went on to use my Ridgid router with 1/2in round over bit to form the top edge. For the bottom I used a 1/4in round over bit from my round over bit set.
Now I paid my attention to the bottom side. The whole piece is wobbling if you move it. I didn’t expect anything else to be honest. To add more strength to the table top I choose to add a 1/8in layer of epoxy to the bottom side. First I started with a brush on seal layer.
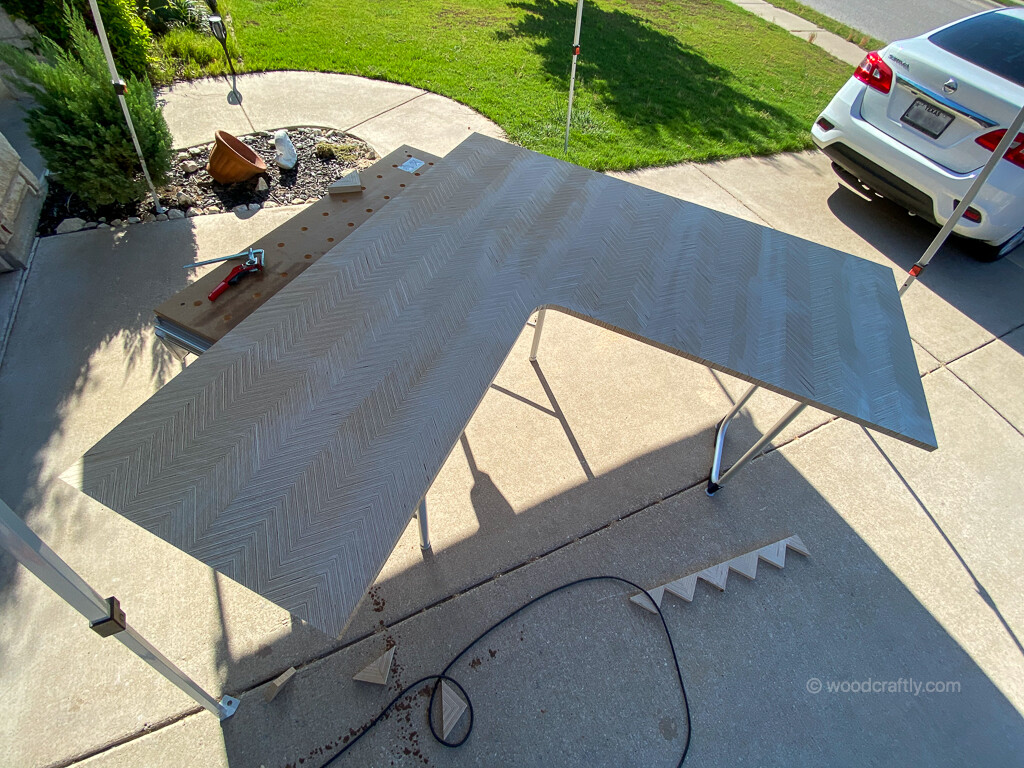
After starring at the table for like 20min I felt bothered by something. The corners! Since I made a round inside corner I decided it would look way better if all corners have the same radius. So I applied the same duct tape role method to each outside corner. Using my jig saw I got to work and rounded all outside corners.
The next day I did the flood coat. I used ProMarine Table Top Epoxy and needed around 25 fl oz. Keep in mind, that is the bottom, so it didn’t need to be super pretty. How ever, I still went over with my heat gun to burst any bubble building up in the epoxy. Against the product instructions, I continued to work on the table top after 24hrs (the cure time for that epoxy is 72hrs, so make sure you follow the instructions if you use it for a visible area).

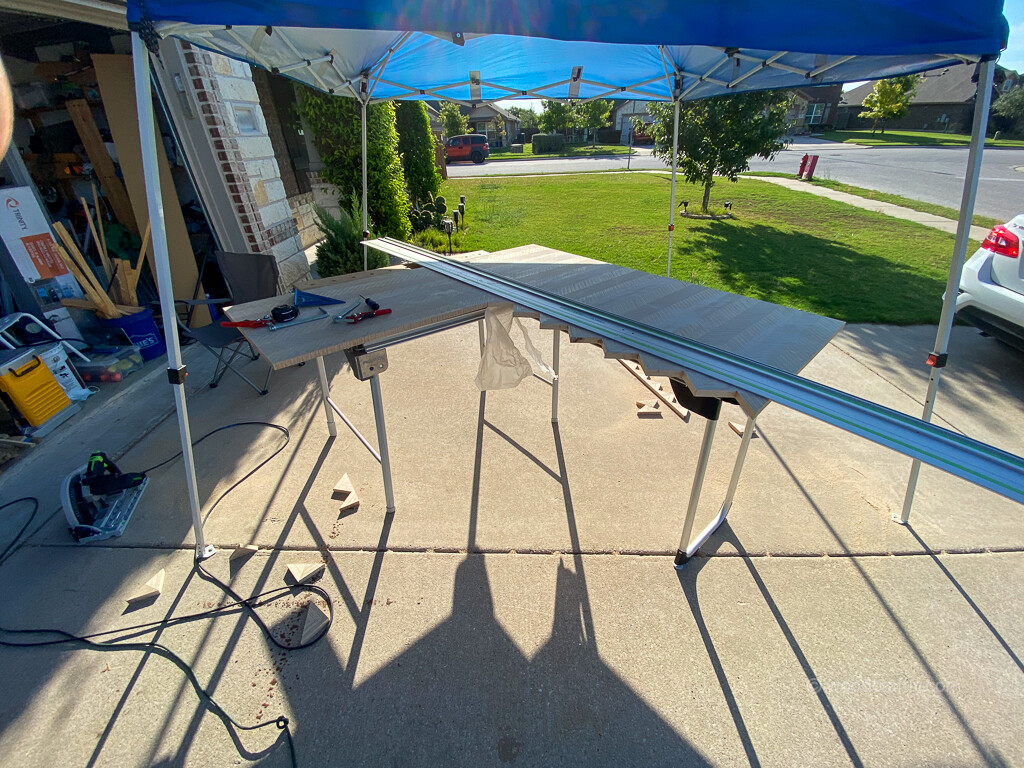
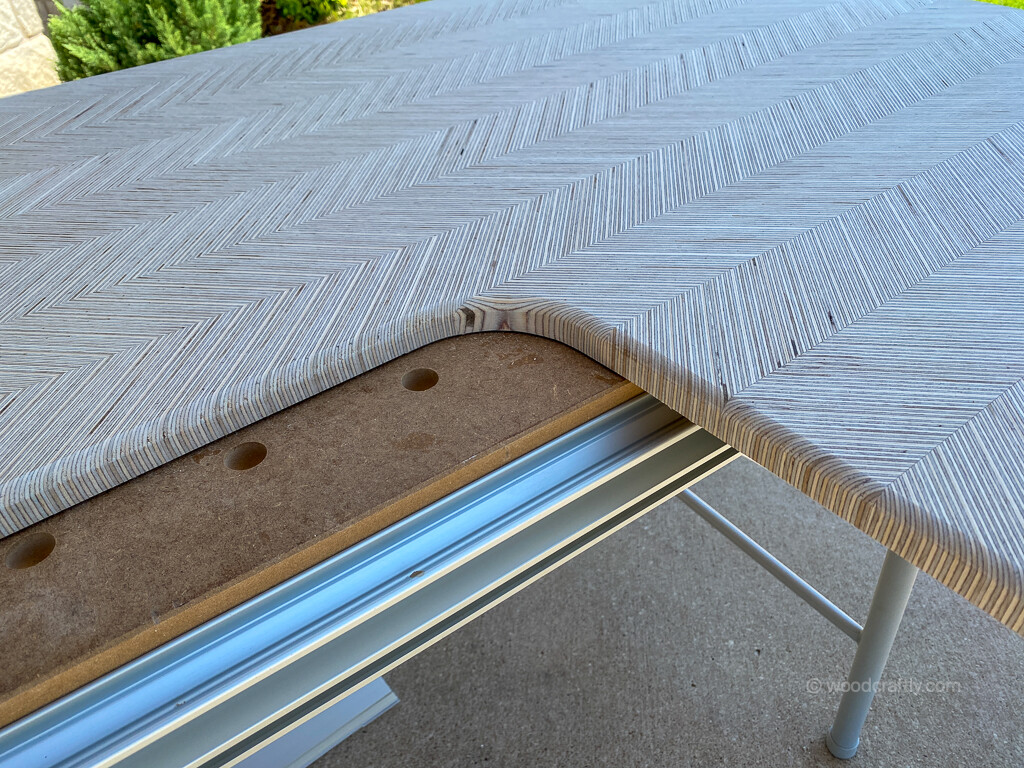
The next morning back in my drive way (taking the risk and ignoring the 72hrs cure time) I went on to install the threaded inserts on the bottom side. I placed the table top on the desk frame to mark and pre-drill the holes.
Btw. you might noticed the gazebo I’m using. I’m in Texas and it’s getting pretty damn hot here, in addition to that as you also might have discovered, my garage is a mess and I don’t have much space there! So the gazebo comes in handy when working in my driveway under the sun! That thing is just a pull to assemble version and folds back into a nice storable tiny piece!
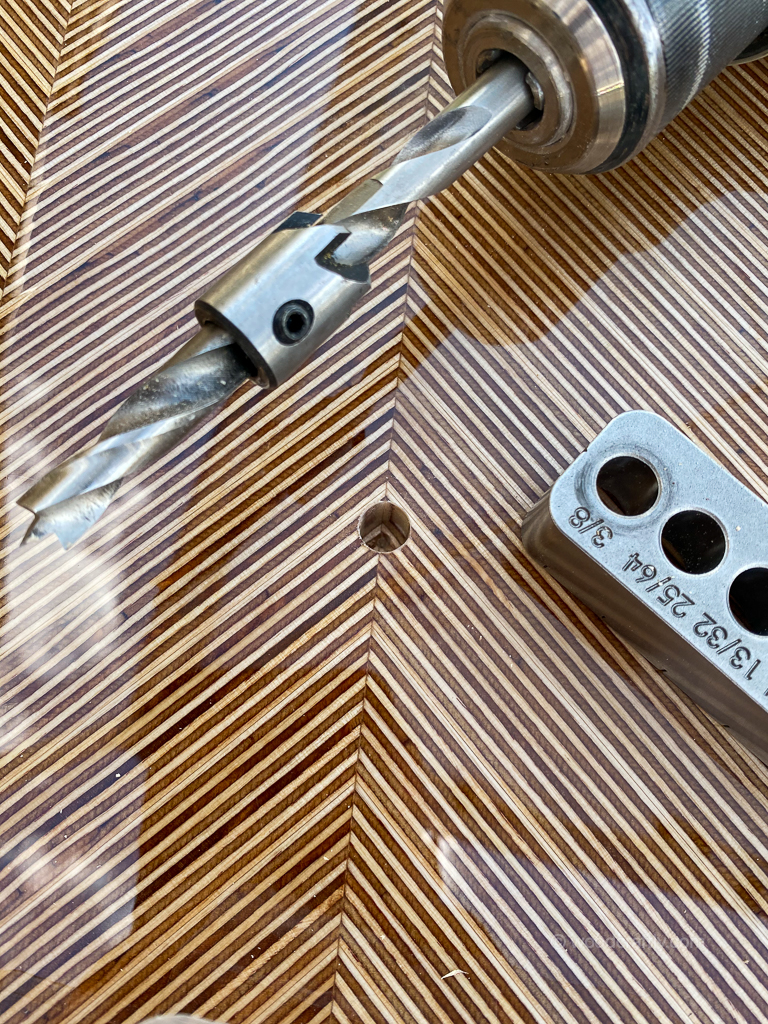
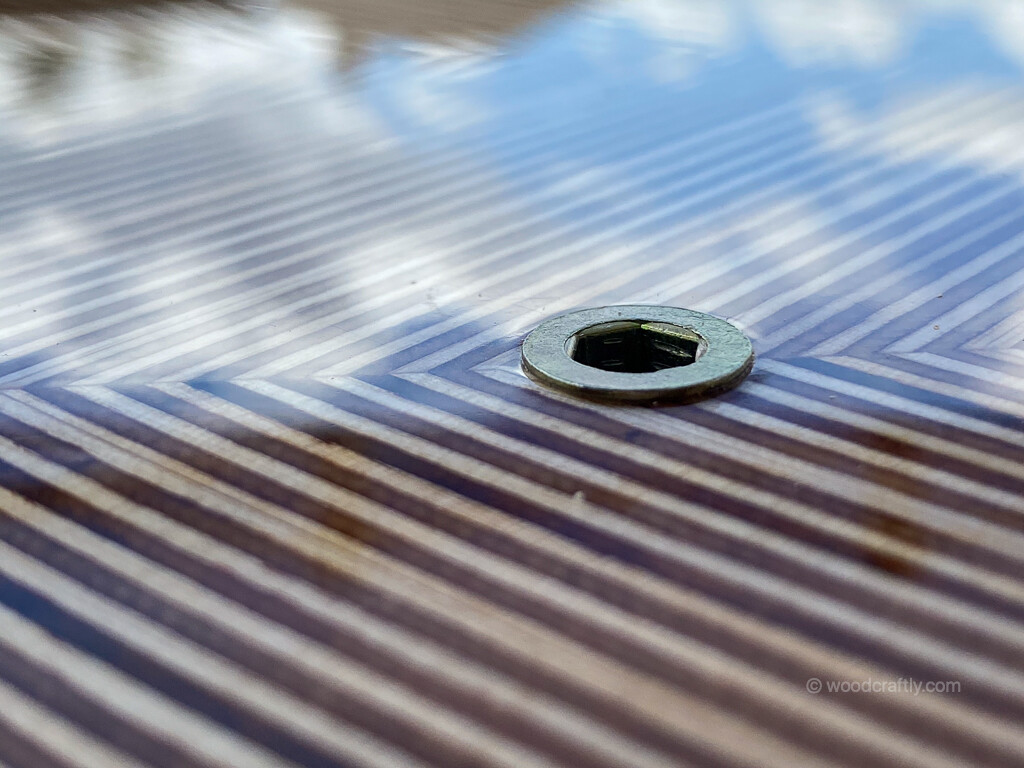
With the holes pre-drilled I used the Big Gator drill guide and the drill bit included in the EZ-Lok threaded insert kit to prepare for the threaded inserts.
As you read at the beginning, I created a sample before I did anything else. That sample I also used to test out the threaded inserts. It failed miserably. I mounted the sample on the desk frame and was able to rip the sample of the desk frame. So I went to the Facebook woodworking group and asked for advised. The suggestion I got was to use T-88 epoxy in the hole before screwing in the threaded inserts. So I tested it again with the sample and the result was impressive, I was not able to rip out the sample.
To make sure you don’t gum up the threads, use painters tape and close the bottom end of the threaded insert.
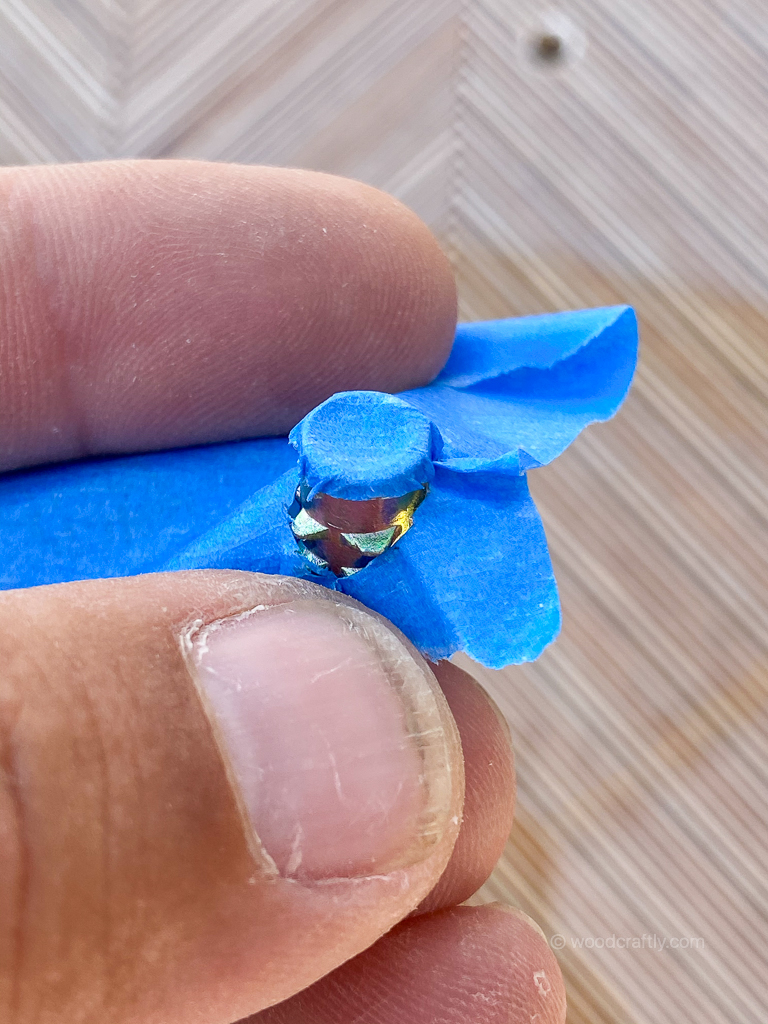
Tighten the tape after you cut the excess off with the cutting knife. Then fill the prepared hole half with T-88 epoxy and screw in the insert. Wipe off any excess immediately and move on to the next hole.
With the threaded inserts done, I flipped the table top and focused on the finish.
First I filled any voids in the table top with wood filler. Patiently (after weeks of work) waited for the filler to cure and sanded down to 150 grit using an orbital sander to prepare for the epoxy.
I used the same ProMarine Table Top Epoxy and just did a seal layer. Brushed it on carefully and removed any excess. I didn’t want any shiny area (those would need to be removed by carefully hand sanding).

After 24hrs I went on to carefully hand sand it down to 320 grit sanding paper, cleaned the surface with compressed air and then with a vacuum. With the surface clean I then applied a home made mineral oil / bees wax paste and buffed it in with a random orbital polisher. Then I let it soak for an hour and wipe off excess. After that I switch to a whole pad and polished again the hole top. After that step I again wiped off any excess using a clean cloth.
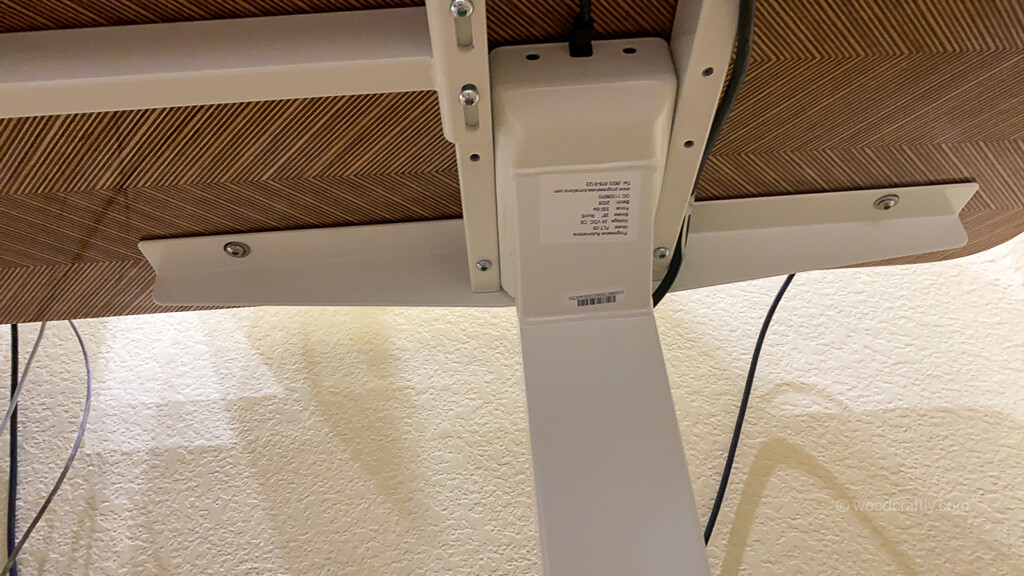
The table top was now extremely smooth and sealed. Now I just mounted the top to the adjustable motorized corner desk frame.
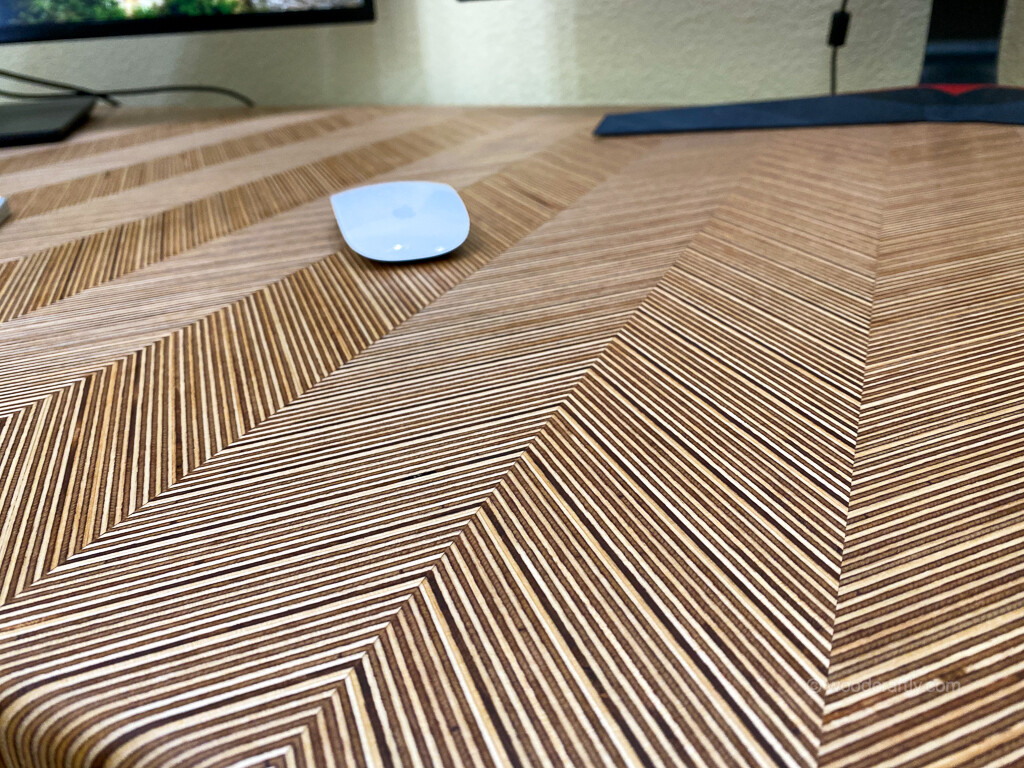
The final result is just incredible. I built the desk for myself since I spend way too many hours in front of the computer and its just a joy now.

I really appreciate your time reading the endleeeees article and hope you found some inspiration for your next project.
Please leave a comment and give me your feedback, I’m by no means an expert and always looking to learn new things or improve my techniques.
Stay tuned for more projects to come!
And please use the share option below to spread the word!
Thank You!
Great Job!
Wow just wow! This must have taken a long time. Admire your patience Sir!
Beautiful work
Wow! I made a few wall hangings using plywood but can’t imagine the time and patience it must have taken to build this beautiful desk!